IQTouch Mounting Height Guide


Introduction
This guide is designed to help you determine the optimal mounting height for IQTouch interactive displays. Proper installation ensures comfortable and ergonomic use for all users, whether they are standing, sitting, or wheelchair-bound.

General Guidelines

  1. Audience Consideration:
    Consider the primary users of the display. The mounting height may vary based on the average height of the users. For classrooms with children, the height will differ from conference rooms designed for adults.

  2. Recommended Mounting Height:
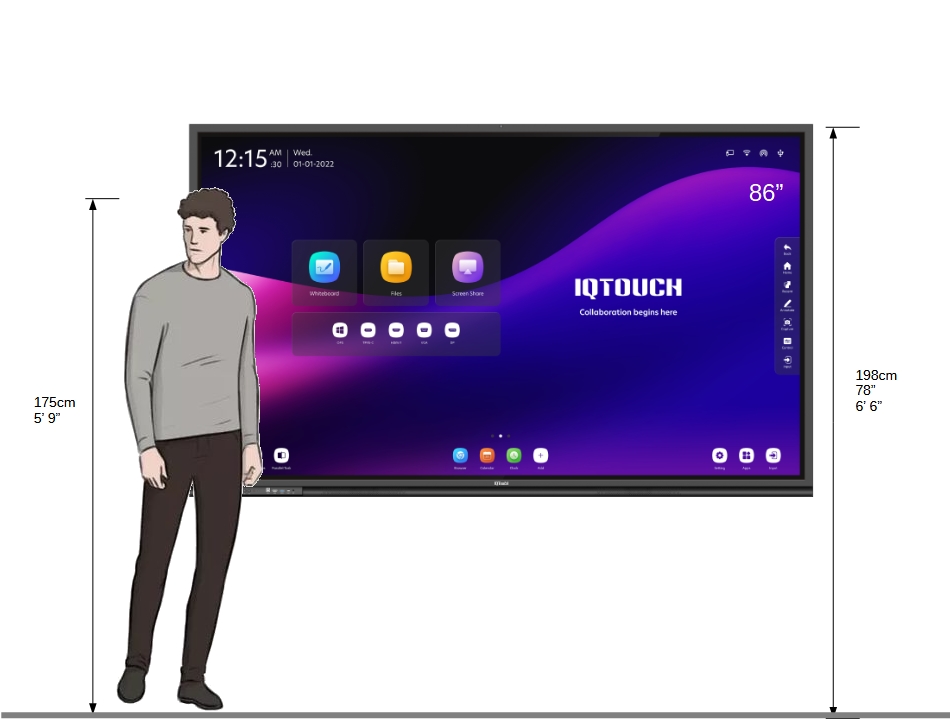
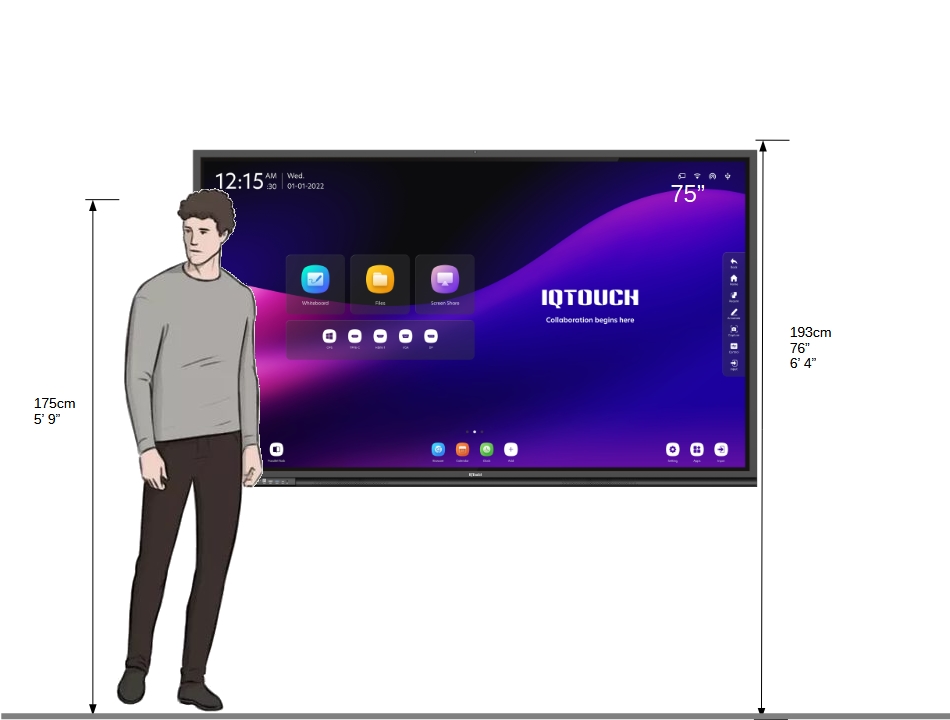
    For most general-purpose installations, the center of the display should be at eye level for the average user. A commonly used formula is: For standing adults:The center of the display should be approximately 60–65 inches (152–165 cm) from the floor.

  3. Special Considerations

    • Viewing Distance:
      Depending on the size of the display, the viewing distance may also influence the mounting height. Larger displays may need to be mounted slightly higher to provide optimal viewing angles for all audience members.

    • Mount Type:
      The mounting height may also vary based on the type of mount being used (fixed, tilt, or mobile). Adjustable mounts offer flexibility in height, which may be ideal for shared spaces with diverse users.

Measurement and Marking Instructions

Before fixing the mounting base on the wall, it’s essential to carefully measure and mark the wall to ensure proper alignment and stability. Follow these steps to ensure the display is mounted securely and at the correct height.

1. Gather Required Tools

  • Measuring tape
  • Spirit level (or laser level)
  • Pencil or marker
  • Drill with appropriate bits
  • Wall anchors (if necessary)
  • Screws and screwdriver
  • Mounting template (if provided)

2. Determine Mounting Height

  • Refer to the Recommended Mounting Height section to determine the appropriate height based on your audience.
  • Decide whether the measurement will be based on the center of the display or the bottom edge of the display. For most installations, it is recommended to measure based on the center of the display.

3. Mark the Centerline

  • Use a measuring tape to determine the height of the center of the display from the floor. Mark this point on the wall with a pencil or marker.
  • Using a spirit or laser level, draw a horizontal line through the center mark. This line will help ensure the display is level once mounted.

4. Measure and Mark the Mounting Base Holes

  • Locate the mounting points on the back of the IQTouch display. Measure the vertical distance from the center of the display to the top and bottom mounting holes.
  • Transfer these measurements to the wall by marking points on the vertical centerline that correspond to the top and bottom mounting holes.
  • Repeat this process for the width of the mounting bracket, ensuring that the points for the screw holes are spaced correctly.

5. Check Alignment and Level

  • Before drilling, use the spirit level to double-check the alignment of the marked points. Ensure that the mounting base holes are evenly spaced and perfectly level.
  • It’s important to ensure all marks align correctly to avoid installing the base at a slant or at the wrong height.

6. Drill Holes and Insert Anchors

  • Once you’ve confirmed the accuracy of the markings, drill pilot holes at the marked points for the screws.
  • If the wall is drywall, brick, or another non-solid surface, insert wall anchors into the pilot holes to provide extra support.

7. Fix the Mounting Base

  • Place the mounting base onto the wall, aligning it with the drilled holes.
  • Secure the mounting base to the wall using the appropriate screws and a screwdriver. If necessary, use a power drill for larger or heavier displays.
  • Tighten the screws but avoid over-tightening, as this could damage the wall or mount.

8. Check for Sturdiness

  • After fixing the base, check that it is securely fastened and level. You can use the spirit level again to ensure there has been no movement during installation.
  • Give the mount a gentle pull to ensure it is properly fixed and stable enough to support the weight of the IQTouch display.

9. Adjust the Mounting Base (if needed)

  • If your mounting base allows for tilt or height adjustment, make any necessary adjustments before attaching the display. This will make it easier to position the screen for optimal viewing.

10. Attach the IQTouch Display

  • Finally, carefully lift and attach the IQTouch display to the mounting base. Ensure it clicks or locks into place securely, and check that it is level one last time before use.
  •  

Views: 132